How to Design a Rain Garden for Effective Stormwater Runoff Management
How to Design a Rain Garden for Effective Stormwater Runoff Management
Reading time: 14 minutes
Here’s a scenario most homeowners know too well: a heavy rainstorm rolls through, and within minutes, water is rushing across your lawn, pooling near your foundation, and carrying fertilizer, oil, and sediment straight into the nearest storm drain. That runoff doesn’t just disappear — it floods streams, degrades water quality, and overloads municipal infrastructure designed for a different era.
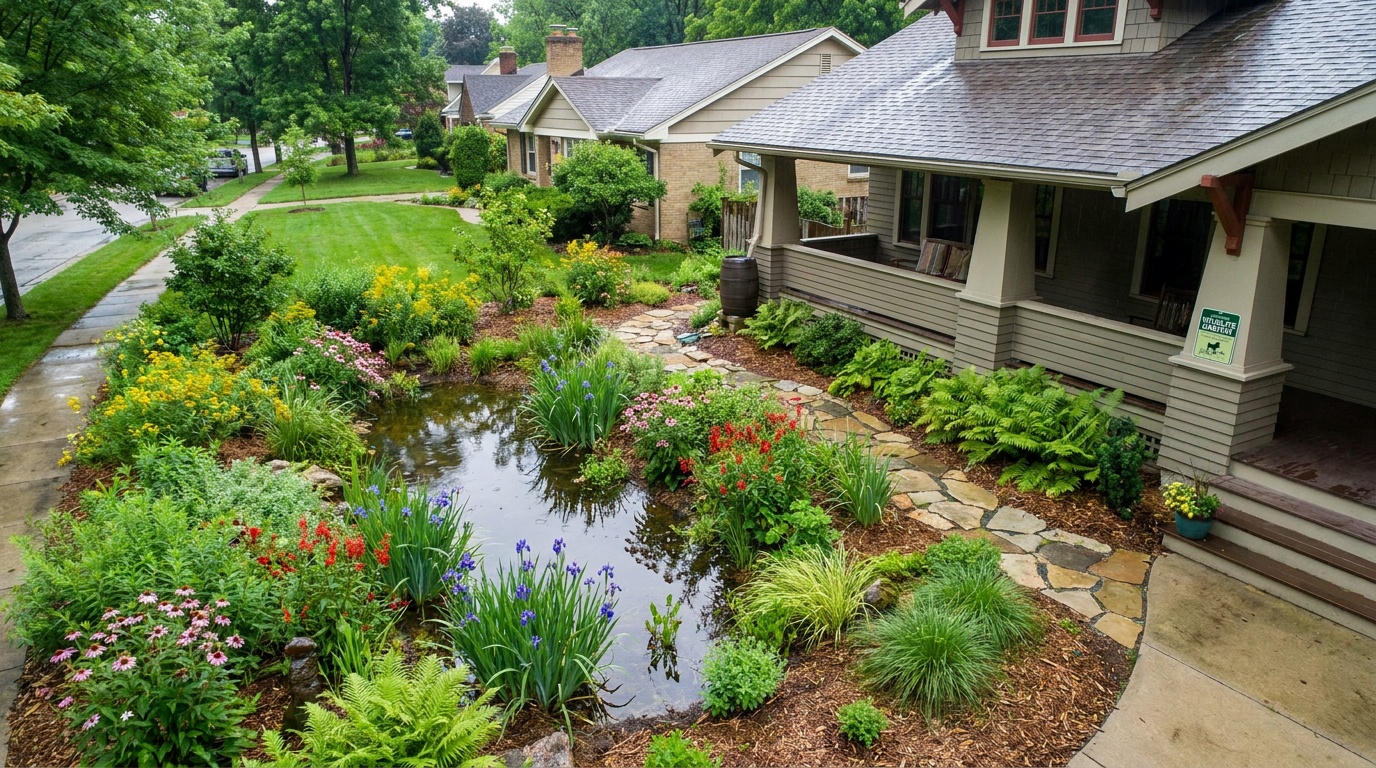
Rain gardens are one of the smartest, most elegant solutions to this modern problem. They’re not just decorative — they’re functional ecosystems that capture, filter, and slowly absorb stormwater before it becomes someone else’s problem. And in 2026, with municipalities across North America, Europe, and Australia increasingly offering incentive programs and rebates for residential green infrastructure, there’s never been a better time to design one.
Let’s cut through the confusion and build you a practical, step-by-step framework for designing a rain garden that actually works.
Table of Contents
- Why Rain Gardens Matter More Than Ever in 2026
- Site Assessment: Finding the Right Location
- Sizing and Shaping Your Rain Garden
- Soil Composition and Layering Strategy
- Plant Selection for Maximum Performance
- Installation Step-by-Step
- Common Challenges and How to Overcome Them
- Rain Garden vs. Other Stormwater Solutions
- Runoff Reduction Performance by Garden Type
- Frequently Asked Questions
- Your Rain Garden Blueprint: Next Steps
Why Rain Gardens Matter More Than Ever in 2026
Urban flooding events have increased by an estimated 37% globally over the past decade, according to the World Resources Institute’s 2025 Urban Water Report. Impervious surfaces — roads, rooftops, driveways, parking lots — now cover more than 40% of land area in many major cities. When rain hits these surfaces, there’s nowhere for the water to go except downstream, fast.
In the United States alone, the EPA estimates that stormwater runoff is the leading source of water quality impairment in urban areas, carrying pollutants including nitrogen, phosphorus, heavy metals, and pathogens directly into waterways. By 2026, more than 1,200 U.S. municipalities have adopted some form of green infrastructure incentive, with rain gardens specifically listed as an approved practice in most state-level stormwater management plans.
But this isn’t purely a municipal concern. Individual homeowners who install a properly designed rain garden can reduce runoff from their property by 30% to 99%, depending on storm intensity and garden design. That’s not a trivial contribution.
“A well-designed rain garden doesn’t just manage water — it rebuilds the hydrological function of a landscape that development stripped away. It’s ecological restoration at the residential scale.” — Dr. Natalie Strickland, Urban Hydrology Research Institute, 2025
Beyond environmental impact, rain gardens offer genuine property benefits: reduced basement flooding risk, lower irrigation needs for surrounding plantings, improved curb appeal, and in many jurisdictions, direct rebates ranging from $200 to over $3,000 depending on garden size and local program generosity.
Site Assessment: Finding the Right Location
The most common mistake homeowners make is choosing a location based on aesthetics alone. A beautiful rain garden in the wrong spot will either stay permanently waterlogged or fail to capture the runoff it was designed to intercept. Site assessment is where great rain garden design begins.
The Four Critical Site Factors
1. Proximity to Runoff Sources
Your rain garden should intercept water before it leaves your property. Ideal positions include downhill from a downspout, at the base of a sloped lawn, or at the edge of a driveway. Trace where water flows during a rainstorm — that’s your guide. Many experienced designers literally walk their site during a moderate rain event with a notebook in hand.
2. Setback Requirements
This is non-negotiable. Rain gardens must be placed:
- At least 10 feet from your home’s foundation — closer and you risk directing water toward your basement
- At least 25 feet from a septic system — saturation near drain fields compromises function
- At least 50 feet from steep slopes greater than 12% — runoff on steep grades is better managed with other methods
- Clear of underground utilities — always call 811 (in the U.S.) before any digging
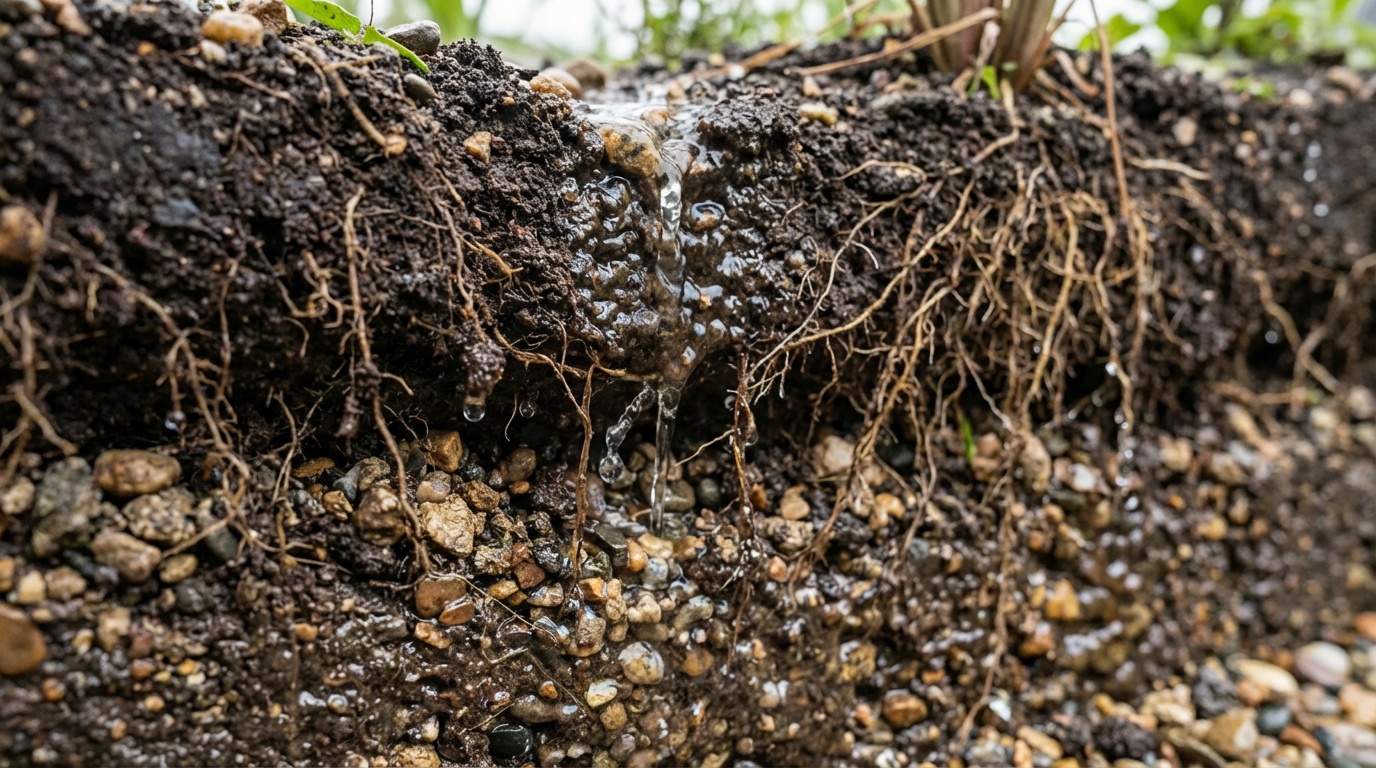
3. Infiltration Rate Testing
This is the step most DIY guides skip, and it’s critical. A rain garden only works if the soil beneath it can absorb water within 24–48 hours. Conduct a simple percolation test: dig a hole 6 inches wide and 12 inches deep, fill it with water, let it drain completely, then refill and measure how many inches drain per hour.
- 0.5–3 inches/hour: Ideal — standard rain garden design works well
- Less than 0.5 inches/hour: You’ll need an amended soil mix or an overflow system
- Greater than 3 inches/hour: Sandy soil — may need organic matter addition to slow drainage
4. Existing Slope and Grading
Rain gardens work best on slopes between 1% and 8%. On a flat site, you may need to create a slight grade to direct flow. On slopes steeper than 8%, you risk erosion within the garden itself. Use a simple line level or a smartphone slope app to measure your site’s gradient before committing to a location.
Real-World Example: The Martinez Family in Portland, Oregon
In 2024, the Martinez family participated in Portland’s Clean River Rewards Program and installed a 200-square-foot rain garden downhill from their roof’s main downspout. Before installation, during moderate rain events, water would pool against their detached garage foundation. After conducting a percolation test that showed a healthy 1.8 inches/hour infiltration rate, they sited the garden 18 feet from the house in a natural low point. Within two storm seasons, basement moisture issues near the garage dropped by 80%, and they received a $1,100 stormwater utility credit — money returned annually as long as the garden is maintained.
Sizing and Shaping Your Rain Garden
Garden size is determined by two things: the area draining into the garden (your drainage area) and the soil’s infiltration capacity. Here’s a practical approach that avoids unnecessary engineering complexity.
The Standard Sizing Formula
For residential gardens with average infiltration rates:
Rain Garden Area = Drainage Area × Design Storm Depth × Adjustment Factor
In practical terms, for a typical residential site with moderate soil, your rain garden should be roughly 20–30% of the area draining into it. So if your roof drains 1,000 square feet into a single downspout, plan for a 200–300 square foot rain garden.
Shape and Depth
- Kidney or crescent shapes intercept sheet flow more effectively than circular designs
- Depth should be 4–8 inches below the surrounding grade — deep enough to hold water during a storm, shallow enough to drain within 48 hours
- Build a flat bottom rather than a V-shaped basin — this distributes water more evenly across the planting zone
- Create a berm (earthen mound) on the downhill side at least 6 inches high to retain water during peak flow
Soil Composition and Layering Strategy
Native soil is rarely ideal for rain gardens out of the box. Most residential yards, particularly in newer developments, have heavily compacted subsoil and thin, low-organic topsoil. A proper rain garden uses an engineered soil mix designed to balance infiltration, filtration, and plant support.
The Three-Layer System
Layer 1: Amended Rain Garden Soil Mix (Top 18–24 inches)
This is the workhorse layer — where most biological activity, filtration, and plant root growth occurs. The widely recommended mix for most climates in 2026 is:
- 50–60% coarse sand or sandy loam (provides drainage)
- 20–30% compost (provides nutrients and microbial activity)
- 20–30% existing topsoil (provides structure and indigenous microbial communities)
Avoid high-clay mixes and pure topsoil — they compact over time and slow infiltration dramatically.
Layer 2: Transition Layer (Optional, 4–6 inches)
A layer of pea gravel or coarse aggregate between the amended soil and native subsoil can improve drainage on particularly tight soils. This is not always necessary but is recommended when percolation rates are borderline.
Layer 3: Native Subsoil
The native subsoil below should be loosened with a broadfork or subsoiler to at least 12 inches below the rain garden floor. Compacted subsoil is the single greatest cause of chronic waterlogging in rain gardens — addressing it during construction is far easier than retrofitting later.
Mulch Layer (Top Dressing)
Apply 2–3 inches of shredded wood chip or bark mulch across the entire rain garden surface after planting. This slows incoming flow velocity, reduces erosion, retains moisture between storms, and suppresses weeds. Avoid rubber mulch or dyed wood chips — they leach compounds that undermine the filtration function you’re trying to build.
Plant Selection for Maximum Performance
This is where your rain garden transforms from a functional basin into a living system. Plant selection isn’t just about aesthetics — the right plants actively improve infiltration, stabilize soil, provide habitat, and dramatically reduce maintenance requirements over time.
Selecting Plants by Zone
Rain gardens naturally create three moisture zones, each suited to different plant communities:
Zone 1: Center (Wet Zone)
This area receives the most water and stays moist longest after storms. Plant species that can tolerate temporary flooding:
- Blue flag iris (Iris versicolor)
- Swamp milkweed (Asclepias incarnata)
- Joe-Pye weed (Eutrochium purpureum)
- Soft rush (Juncus effusus)
- Cardinal flower (Lobelia cardinalis)
Zone 2: Middle (Transitional Zone)
Periodically wet, periodically dry — the most diverse planting zone:
- Black-eyed Susan (Rudbeckia hirta)
- Wild bergamot (Monarda fistulosa)
- Purple coneflower (Echinacea purpurea)
- Switchgrass (Panicum virgatum)
Zone 3: Edge (Berm Zone)
The driest part of the garden — the uphill berm and perimeter:
- Little bluestem (Schizachyrium scoparium)
- Aromatic aster (Symphyotrichum oblongifolium)
- Prairie dropseed (Sporobolus heterolepis)
Pro Tip: In 2026, many local native plant societies and university extension programs offer regionally specific rain garden plant lists for free download. These account for your specific climate, soil type, and pest pressures — always prioritize regional lists over generic national guides.
Installation Step-by-Step
Let’s translate design into action. Here’s a practical installation sequence that a motivated homeowner or small landscaping crew can complete over a weekend for a standard 150–300 square foot garden.
- Mark and Stake the Garden Perimeter — Use marking paint or garden hose to define the shape on the ground.
- Call for Utility Locates — In the U.S., call 811 at least 3 business days before digging. This is legally required and practically essential.
- Remove Existing Turf — Use a sod cutter, smother with cardboard layers, or apply a targeted herbicide if organic methods aren’t feasible.
- Excavate the Basin — Dig to your target depth (typically 18–24 inches total for soil replacement). Keep the bottom flat and level.
- Loosen the Subsoil — Use a broadfork or rented subsoiler to break compaction another 12 inches below the excavated floor.
- Build the Berm — Use excavated soil to construct the downhill berm. Compact it lightly and plant or seed it with stabilizing grasses immediately.
- Install the Amended Soil Mix — Add your engineered mix in 6-inch lifts, lightly tamping each layer without over-compacting.
- Install the Inlet — Connect your downspout diverter or construct a gravel-lined inlet channel to direct flow into the garden gently. A splash pad of flat stones at the inlet prevents erosion from direct downspout discharge.
- Install an Overflow Structure — Every rain garden needs an overflow for events that exceed its capacity. A notch in the berm lined with riprap or a perforated overflow pipe prevents uncontrolled erosion during extreme storms.
- Plant and Mulch — Install plants at recommended spacing (typically 12–18 inches for perennials, 18–24 inches for grasses). Apply 2–3 inches of mulch across the entire surface, keeping it 2 inches away from plant stems.
- Water In and Monitor — Water thoroughly after installation. Check for standing water 48 hours after the first rain event.
Common Challenges and How to Overcome Them
Even well-designed rain gardens encounter obstacles. Here are the three most frequently reported issues in 2025–2026, along with practical solutions.
Challenge 1: Chronic Standing Water
Symptom: Water remains in the garden for more than 48–72 hours after a rain event, leading to plant die-off and mosquito concerns.
Causes: Compacted subsoil, insufficient soil amendment, or improper sizing.
Solutions:
- Install a perforated underdrain pipe at the bottom of the garden connected to a storm drain or daylight outlet
- Excavate the bottom layer and replace with a gravel sump (12 inches of clean angular gravel) before reinstalling amended soil
- Add mosquito dunks (Bacillus thuringiensis israelensis) as an interim biological control while improving drainage
Challenge 2: Erosion at the Inlet
Symptom: Soil washing out of the garden, sediment accumulation in the basin center, or channel cutting from downspout discharge.
Solutions:
- Install a 12–18 inch wide riprap splash pad where water enters the garden
- Add a energy dissipator — a vertical section of perforated pipe buried in gravel — at the downspout connection point
- Plant dense groundcover (such as creeping Jenny or native sedges) throughout the inlet zone
Challenge 3: Invasive Weed Establishment
Symptom: Rain gardens, especially in the first 1–2 years, are highly susceptible to weed invasion because the disturbed soil and open spacing invite opportunistic species.
Solutions:
- Apply and refresh mulch annually — a 3-inch layer blocks 80–90% of weed seed germination
- Hand weed aggressively in years 1 and 2 before native plants establish dense root mats
- Seed the garden with a nurse crop of annual native flowers in year one to occupy bare soil while perennials establish
Rain Garden vs. Other Stormwater Solutions
| Feature | Rain Garden | Detention Pond | Permeable Paving | Green Roof |
|---|---|---|---|---|
| Installation Cost (Residential) | $500–$4,000 | $10,000–$50,000+ | $8–$25/sq ft | $10–$30/sq ft |
| Runoff Reduction Potential | 30–99% | 50–80% | 45–75% | 40–90% |
| Habitat Value | High | Moderate | Very Low | Moderate |
| Maintenance Requirement | Low–Moderate | High | Moderate | Moderate–High |
| DIY Feasibility | High | None | Low | Very Low |
Runoff Reduction Performance by Garden Design Type
Based on field monitoring data from the 2025 National Green Infrastructure Performance Survey (250+ residential installations), here’s how different rain garden configurations perform for average storm events:
Standard Native Planting (amended soil)
Turf Grass Basin (unmodified soil)
Native Planting + Underdrain System
Deep Sump Design (gravel layer added)
Basic Mulch Basin (no soil amendment)
Key insight: Soil amendment is the single most impactful design decision. Gardens with properly engineered soil mixes outperform unmodified basins by an average of 46 percentage points.
Frequently Asked Questions
Will a rain garden attract mosquitoes?
This is the most common concern, and the good news is: a properly designed rain garden will not create a mosquito breeding problem. Mosquitoes require standing water for at least 7–10 days to complete their larval cycle. A rain garden built to specification drains completely within 24–48 hours after each storm event. If your garden is chronically holding water beyond 72 hours, that’s a drainage problem requiring correction (see the challenges section), not an inherent feature of rain gardens. During establishment, if standing water persists, biodegradable Bti dunks (mosquito dunks) are an effective, non-toxic interim solution.
Do I need a permit to build a rain garden on my property?
In most U.S. jurisdictions as of 2026, residential rain gardens under a certain size threshold (commonly 500 square feet) do not require a formal permit. However, rules vary significantly by municipality and state. Always check with your local zoning or public works department before construction. In some regions — particularly those with active stormwater fee discount programs — registering your rain garden is actually beneficial, as it qualifies you for ongoing utility credits. If you’re connecting to an existing drainage system or modifying a downspout, additional requirements may apply.
How long before my rain garden starts performing well?
Expect a performance ramp-up over 2–3 growing seasons. In year one, plant root establishment is the priority — you’ll see some stormwater capture, but plant density and root depth are limited. By year two, native perennials and grasses typically double their root biomass, dramatically improving both infiltration rates and soil structure. By year three, most well-designed rain gardens reach their near-maximum performance levels and transition to a largely self-sustaining system requiring only annual maintenance: light weeding, mulch refreshing, and removal of any invasive species. The patience required in years one and two pays compounding dividends for the 20–30+ year lifespan of the garden.
Your Rain Garden Blueprint: Next Steps
You now have the essential framework to move from concept to construction. Here’s how to transform that knowledge into action — strategically, not all at once.
- Week 1 — Observe and Document: Walk your property during the next rain event. Photograph where water flows, pools, and exits. This observational data is more valuable than any survey for siting your garden.
- Week 2 — Test and Research: Conduct a percolation test at your preferred location. Check your local municipality’s website for rebate programs or approved design guidelines — in 2026, over 60% of U.S. cities with populations above 50,000 offer some form of financial incentive for residential rain gardens.
- Week 3 — Design and Source: Sketch your garden layout using the sizing formula, identify your three planting zones, and source your amended soil mix and native plants from a regional native plant nursery.
- Week 4–6 — Build and Plant: Follow the 11-step installation sequence, starting with utility locates. Schedule installation for early spring or early fall for optimal plant establishment conditions.
- Ongoing — Monitor and Refine: Keep a simple log of how your garden performs through each storm season. Most experienced rain garden designers make minor tweaks in year two — adjusting overflow structures, adding plants to bare spots, improving inlet energy dissipation.
Rain gardens sit at the intersection of two of the most pressing trends of this decade: the urgent need for urban climate resilience infrastructure and the growing homeowner demand for landscapes that are beautiful and ecologically purposeful. What you build in your backyard is genuinely connected to watershed health, downstream community flooding, and the long-term viability of municipal stormwater systems that are already under strain.
The real question isn’t whether you can afford to build a rain garden — with rebates, DIY construction, and multi-decade water and maintenance savings, most homeowners find they can’t afford not to. The question is: what will your piece of land do with the next rainstorm — send that water away as a problem, or hold it as a resource?
Article reviewed by Linda Phillips, Senior Architectural Consultant & Renovation Project Manager, on May 4, 2026