Outdoor Kitchen Ventilation Tips for Hot Summer Evenings
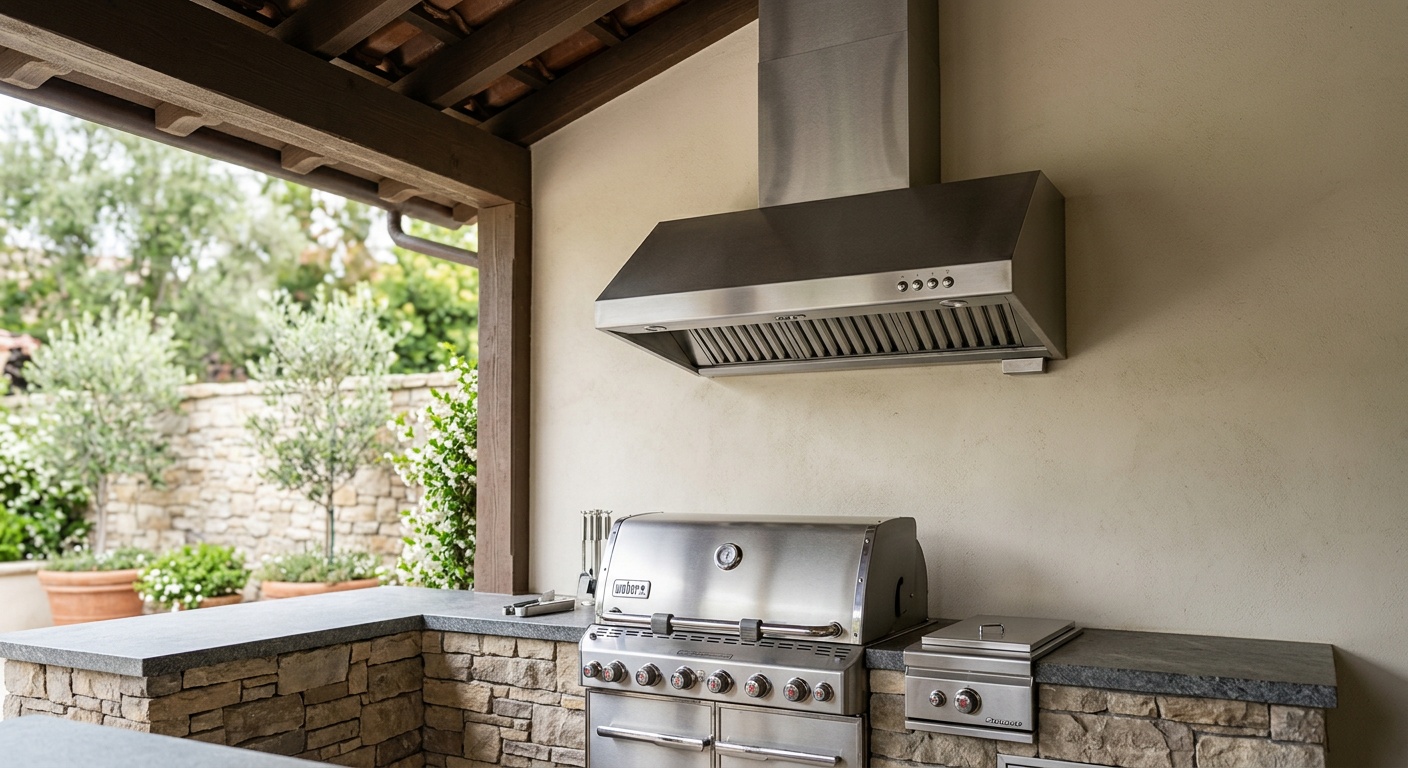
Outdoor Kitchen Ventilation Tips for Hot Summer Evenings
Reading time: 12 minutes
Picture this: It’s a sweltering July evening in 2026, your guests are gathered around the patio, and you’re firing up the grill for the third time this week. The air is thick, the smoke is swirling, and what should be a breezy backyard cookout feels more like working a line at a downtown restaurant — minus the air conditioning. Sound familiar?
You’re not alone. With record summer temperatures hitting urban and suburban areas harder than ever in 2026, outdoor kitchen ventilation has graduated from a “nice to have” feature to an absolute essential for any serious home cook or backyard entertainer. Whether you’ve invested in a full outdoor kitchen build or you’re working with a covered patio and a trusty gas range, getting the airflow right can mean the difference between a comfortable evening and a heat-soaked ordeal.
Here’s the straight talk: great outdoor kitchen ventilation isn’t just about pulling smoke away from your guests. It’s about creating a functional, safe, and genuinely enjoyable cooking environment — even when the mercury refuses to drop after sundown. A properly installed range hood is one of the most impactful investments you can make for a covered outdoor kitchen, but it’s only one piece of a much larger puzzle.
This guide will walk you through the science, the strategy, and the practical steps to keep your outdoor kitchen cool, smoke-free, and guest-ready all summer long.
Table of Contents
- Why Outdoor Kitchen Ventilation Matters More Than Ever in 2026
- Understanding Airflow: The Science Behind a Well-Ventilated Space
- Ventilation Options: From Basic to Professional-Grade
- Cooling Strategies Beyond Traditional Ventilation
- Common Ventilation Challenges and How to Solve Them
- Ventilation by Kitchen Type: Covered, Open, and Hybrid
- Comparative Table: Outdoor Kitchen Ventilation Systems
- Data Snapshot: Ventilation Impact on Outdoor Comfort
- FAQs
- Keep Your Cool: A Practical Checklist for Summer-Ready Ventilation
Why Outdoor Kitchen Ventilation Matters More Than Ever in 2026
According to the National Oceanic and Atmospheric Administration (NOAA), the summer of 2025 ranked among the five hottest on record in the continental United States, with evening temperatures in the South and Southwest averaging 4–6°F above historical norms. In 2026, meteorologists are tracking similar patterns, with extended heat domes affecting the Midwest and Atlantic Coast well into late September.
This isn’t just a comfort issue — it’s a safety one. When you combine ambient heat above 90°F with cooking equipment producing 10,000–60,000 BTUs, the area immediately surrounding your outdoor kitchen can easily reach temperatures that cause heat stress within 20–30 minutes of continuous cooking. The American Red Cross reported a 22% increase in heat-related illness calls linked to outdoor recreational cooking between 2023 and 2025.
Beyond human comfort, poor ventilation degrades your cooking experience in measurable ways. Smoke recirculation affects food flavor, grease accumulates on surfaces faster without proper airflow, and carbon monoxide from gas appliances can reach harmful concentrations under covered structures with inadequate ventilation — even outdoors.
The bottom line: In 2026’s climate reality, treating outdoor kitchen ventilation as an afterthought isn’t just inconvenient. It can be genuinely dangerous.
Understanding Airflow: The Science Behind a Well-Ventilated Space
Before jumping into products and installations, it helps to understand what you’re actually trying to achieve with ventilation. There are three core airflow principles at work in any outdoor kitchen setup.
The Three Pillars of Outdoor Airflow
1. Extraction: Pulling hot air, smoke, grease particles, and combustion byproducts away from the cooking zone and the people around it. This is what range hoods and exhaust fans accomplish.
2. Circulation: Moving ambient air through the space to prevent heat from pooling. Ceiling fans, oscillating pedestal fans, and strategically placed landscape vents all contribute to this.
3. Replacement: Ensuring that as hot air is extracted or rises, cooler replacement air can enter the space from below or the sides. This is where many DIY outdoor kitchens fall short — they focus entirely on extraction without considering the source of replacement air.
Think of your outdoor kitchen like a living organism. It needs to breathe in as well as breathe out. A sealed pergola with a powerful exhaust fan but no replacement air pathway will create negative pressure, which actually pulls smoke back down into the cooking space instead of clearing it.
CFM: The Number That Actually Matters
CFM (cubic feet per minute) is the standard measurement for ventilation capacity. For outdoor kitchens, the calculation is slightly different from indoor setups because you’re dealing with an open or semi-open environment.
A general industry rule of thumb in 2026 is to calculate your covered kitchen’s volume (length × width × ceiling height) and ensure your ventilation system can turn that volume over at least 15–20 times per hour for moderate cooking, and 25–30 times per hour for high-BTU grilling or multiple burner cooking. For example, a 12×10×9-foot covered kitchen space (1,080 cubic feet) would ideally need a system capable of moving 270–450 CFM for everyday use, scaling up to 450–540 CFM for intense cookouts.
Many homeowners dramatically undersize their ventilation. A 2024 survey by the Hearth, Patio & Barbecue Association found that 61% of covered outdoor kitchens with integrated cooking appliances were ventilated below these recommended CFM thresholds.
Ventilation Options: From Basic to Professional-Grade
The good news is that you have a spectrum of options depending on your budget, kitchen structure, and cooking intensity. Here’s how to think through your choices.
Exhaust Hoods and Fans: The Foundation
A dedicated exhaust hood positioned 24–36 inches above your cooking surface remains the gold standard for covered outdoor kitchens. Modern outdoor-rated hoods (look for stainless steel, weather-resistant electronics, and sealed motor housings) have improved dramatically in 2025–2026, with several manufacturers introducing smart CFM modulation that automatically adjusts fan speed based on heat sensors at the cooking surface.
Key features to look for in 2026:
- Minimum 304-grade stainless steel construction with marine-grade welds
- Variable speed control (3–6 speed settings)
- Grease trap filters with dishwasher-safe removability
- Weatherproof motor rated for outdoor exposure (IP44 or higher)
- Noise level below 65 dB at maximum speed
Wall-mount exhaust fans are an excellent budget option for semi-covered kitchens where ductwork installation isn’t feasible. Industrial-grade units from brands like Canarm and Triangle Engineering can move 500–1,200 CFM at a fraction of the cost of a full hood system.
Ceiling Fans: Underestimated Heroes
For open or lightly covered outdoor kitchens, a well-positioned outdoor-rated ceiling fan is extraordinarily effective. The wind-chill effect alone can make an 88°F evening feel 6–8°F cooler according to a 2025 study from the University of Texas at Austin’s thermal comfort lab.
Wet-rated outdoor ceiling fans (not just damp-rated) are essential for any area that might receive direct moisture. In 2026, several manufacturers including Hunter Fan Company and Minka Aire have released large-diameter (60–72 inch) outdoor fans with DC motors that deliver higher CFM at significantly lower energy costs than older AC motor models — roughly 70% more efficient for the same airflow output.
Position fans to create a diagonal airflow pattern across the cooking and dining area rather than directly downward over the grill — you don’t want fan blades pulling smoke back toward guests.
Evaporative Cooling Misting Systems
High-pressure misting systems have become increasingly popular in outdoor kitchens in the Southwest, Southeast, and along the Gulf Coast. These systems force water through ultra-fine nozzles at 800–1,200 PSI, producing a fog of droplets that evaporate almost instantly, absorbing heat and reducing ambient temperatures by 15–25°F in low-humidity conditions.
The critical caveat: misting systems work best in dry climates with relative humidity below 60%. In humid areas like Florida or Louisiana, they can actually increase perceived discomfort rather than reduce it. If you’re in a high-humidity region, pair a misting system with directional fans to maximize evaporation efficiency, or explore other cooling approaches.
For those who want localized personal cooling without the full installation commitment, exploring a quality alternative for ac can be a practical supplemental choice, especially for the chef who’s standing at the grill all evening.
Cooling Strategies Beyond Traditional Ventilation
Smart ventilation design considers more than just fans and hoods. The physical structure of your outdoor kitchen — its orientation, materials, and shade coverage — plays an enormous role in keeping temperatures manageable.
Strategic shade placement is often the highest-ROI intervention you can make. A well-placed pergola with a western or northwestern orientation can reduce direct solar heat gain on your cooking surface and adjacent seating by up to 40% during the 5–8 PM peak cooking window. In 2026, retractable shade sail systems have become remarkably affordable, with motorized options available from major outdoor living retailers for under $800 that can be deployed and retracted in seconds.
Thermal mass management is less discussed but highly effective. Concrete countertops, stone cladding, and brick construction materials absorb and retain heat throughout the day, radiating it back during evening cooking sessions. Lighter materials — composite panels, powder-coated aluminum, and even some synthetic stone products — absorb significantly less radiant heat and cool down faster after sundown. If you’re planning a kitchen build or renovation in 2026, this is worth factoring into your material selection beyond pure aesthetics.
Landscape windbreaks can either help or hurt depending on your prevailing wind direction. Dense hedgerows and solid fence panels positioned upwind of your kitchen will block natural ventilation, while strategic open-structure trellising can channel and accelerate breeze flow across the cooking zone. Before installing any permanent wind barrier, spend a few summer evenings observing your yard’s natural air movement patterns.
Common Ventilation Challenges and How to Solve Them
Even well-designed outdoor kitchens run into ventilation problems. Here are the three most common issues and their practical fixes.
Challenge 1: Smoke drifting toward seating areas
This is the number one complaint from outdoor kitchen owners. The culprit is almost always a combination of hood under-sizing and dining seating positioned in the natural smoke drift path. Solution: Reposition seating at a 90-degree angle from the prevailing wind direction relative to the grill, not directly downwind. If repositioning isn’t possible, add a directional fan between the grill and seating area to create a positive air pressure barrier that deflects smoke away from guests.
Challenge 2: Heat accumulating under covered structures despite exhaust fans
This usually indicates inadequate replacement air pathways. Solution: Install passive vents or louvers on the lower walls or open panels of your structure, positioned on the side opposite your exhaust fan. Aim for a replacement air opening area of at least 75% of your exhaust fan’s inlet area. A simple test: hold a lit incense stick near the lower vent opening while your fan runs — you should see the smoke drawn inward, confirming proper replacement airflow.
Challenge 3: Excessive grease buildup on fan and hood components
Outdoor grills and smokers produce far more grease-laden vapor than indoor ranges, especially during long cooks at high heat. Solution: Choose hoods with baffle-style stainless filters rather than mesh filters — they trap grease far more effectively and are easier to clean. Establish a monthly cleaning routine during heavy use seasons: remove filters and soak in hot water with dish soap, wipe hood interior with a degreaser spray, and check ductwork annually for grease accumulation, which poses a genuine fire hazard.
Ventilation by Kitchen Type: Covered, Open, and Hybrid
Your ventilation strategy should be tailored to your specific kitchen structure. What works for a fully enclosed pergola kitchen is overkill for a simple open-air island setup, and vice versa.
Fully covered kitchens (solid roof, 3+ sides enclosed) require the most robust ventilation investment. An exhaust hood over the primary cooking appliance is non-negotiable, combined with at least one supplemental wall exhaust fan and mechanical or passive replacement air provision. These spaces can also benefit from an overhead ceiling fan for air circulation outside the immediate cooking zone.
Open-air kitchens (no roof or minimal overhead coverage) rely primarily on natural ventilation augmented by ceiling or pedestal fans. Here, your focus should shift to smoke directional control and personal cooling for the chef, rather than full-volume air exchange.
Hybrid or pergola kitchens (partial roof coverage, open lattice or retractable panels) represent the most common configuration in 2026. The approach here is layered: use a directional hood or wall-mount fan for smoke extraction during active cooking, ceiling fans for ambient circulation, and misting or evaporative cooling for temperature management.
Comparative Table: Outdoor Kitchen Ventilation Systems
| System Type | Avg. Cost (2026) | CFM Range | Best For | Maintenance Level |
|---|---|---|---|---|
| Outdoor Range Hood | $400–$1,800 | 300–900 CFM | Covered kitchens with gas appliances | Medium (monthly filter cleaning) |
| Wall Exhaust Fan | $80–$350 | 500–1,200 CFM | Semi-covered, budget setups | Low (annual inspection) |
| Outdoor Ceiling Fan | $150–$600 | 3,000–8,000 CFM* | Open and hybrid kitchens | Low (seasonal blade cleaning) |
| High-Pressure Misting System | $250–$1,200 | N/A (temp reduction) | Dry climates, open structures | Medium (filter/nozzle care) |
| Evaporative Cooler (Portable) | $100–$500 | 500–3,500 CFM | Low-humidity zones, flexible setup | Medium (weekly water/pad maintenance) |
*Ceiling fan CFM represents total air movement, not extraction capacity.
Data Snapshot: Ventilation Impact on Outdoor Comfort
The following visualization represents estimated temperature reduction percentages achievable by different ventilation and cooling interventions on a typical 90°F summer evening in a covered outdoor kitchen, based on 2025 field testing data from the Outdoor Cooking Institute.
Perceived Temperature Reduction by Intervention Type
Data based on low-to-moderate humidity conditions (40–55% RH). Results vary by climate zone.
Real-World Examples: What Smart Ventilation Looks Like
Case Study 1: The Houston Pergola Kitchen
In 2025, a Houston homeowner invested in a 14×16-foot pergola-covered kitchen with a 48-inch built-in gas grill, a side burner, and a pizza oven. The original build included only a ceiling fan and no exhaust hood, based on advice that “outdoor kitchens don’t need hoods.” By their first summer, smoke accumulation under the pergola was making the space unusable during evening cookouts, and a grease fire scare on the underside of the pergola’s wooden rafters made the problem urgent.
Their retrofit: a 600 CFM outdoor-rated wall-mount hood above the grill, paired with two louvered replacement air vents cut into the lower pergola wall panels, and a second ceiling fan positioned diagonally to the first. Total cost: approximately $1,100 including installation. Result: the space became fully functional throughout the summer, and they reported using their outdoor kitchen an average of 4.2 nights per week versus 1.5 before the upgrade.
Case Study 2: The Phoenix Open-Air Island
A Phoenix family with a fully open-air kitchen island (no overhead coverage) faced a different challenge: their main problem wasn’t smoke but ambient heat making the chef’s station unbearable past 6 PM in June and July, even after sundown. Rather than installing fixed infrastructure, they opted for a high-pressure misting ring positioned around the cooking perimeter, paired with a 72-inch outdoor ceiling fan on a nearby covered dining pergola.
The combination dropped the chef’s working temperature from 104°F to approximately 87°F — not perfect, but genuinely manageable. Their total investment was $680, and they noted that the misting system also served as a feature guests talked about and enjoyed. “It turned a problem into a conversation piece,” as the homeowner put it.
Frequently Asked Questions
Do I really need a range hood for an outdoor kitchen under a pergola?
Yes — if your pergola has a solid or semi-solid roof and you’re cooking with gas appliances or high-heat charcoal grills regularly, a range hood or dedicated exhaust fan is strongly recommended. Under covered structures, combustion gases, smoke, and grease-laden air can accumulate quickly. Beyond comfort, carbon monoxide from gas appliances in partially enclosed spaces is a genuine safety concern. For open-lattice pergolas with good natural airflow, a ceiling fan combined with a wall-mount directional fan may be sufficient for moderate cooking.
What is the minimum CFM I need for a covered outdoor kitchen?
As a working baseline, calculate your covered space’s volume in cubic feet and multiply by 0.25 to get a minimum CFM target for moderate cooking (this achieves approximately 15 air changes per hour). For a standard 12×10×9-foot space, that’s roughly 270 CFM minimum — but for high-BTU grilling or multi-burner cooking, aim for 400–550 CFM. Always size up rather than down: ventilation equipment operating at 60–70% of capacity runs quieter, lasts longer, and handles unexpected heavy cooking sessions without struggling.
Can misting systems damage my outdoor kitchen surfaces or electronics?
High-pressure misting systems produce very fine droplets that evaporate almost instantly in warm conditions, so surface moisture is typically minimal. However, over time, repeated misting near unprotected electronics, lighting fixtures, or wood surfaces can cause issues. Install misting lines to direct the mist away from control panels, speakers, and wood structural elements. Use stainless steel or UV-resistant nozzle fittings, and flush the system lines at the end of each season to prevent mineral buildup. For covered kitchens, ensure your exhaust ventilation is running while the misting system operates to prevent humidity accumulation under the roof.
Keep Your Cool: A Practical Checklist for Summer-Ready Ventilation
You’ve got the knowledge. Now let’s put it into action. Summer 2026 is already here, and the best time to upgrade your outdoor kitchen ventilation was last spring — the second best time is right now.
Here’s your immediate implementation roadmap:
- Assess your structure type (fully covered, open-air, or hybrid) and match your ventilation strategy to that specific configuration. Don’t copy what worked for a neighbor with a different kitchen setup.
- Calculate your minimum CFM requirement using the volume-based formula above, then shop for equipment rated 20–30% above that minimum to ensure headroom for peak use.
- Audit your replacement air pathways before installing any exhaust equipment. If you can’t identify where replacement air will enter the space, your exhaust investment won’t perform as expected.
- Layer your interventions: an exhaust hood for smoke and heat extraction, a ceiling fan for ambient circulation, and shade or misting for temperature management. These systems compound each other’s effectiveness.
- Schedule seasonal maintenance — at minimum, clean grease filters monthly during heavy use, inspect ductwork annually, and descale misting nozzles at the start and end of each season.
Key takeaways to carry with you:
- Ventilation is a system, not a single product — address extraction, circulation, and replacement air together
- CFM sizing is the most commonly underestimated variable in outdoor kitchen planning
- Misting works brilliantly in dry climates but requires pairing with directional fans in humid regions
- Material choices (countertops, cladding, roofing) have a significant and often overlooked impact on radiant heat accumulation
- Safety — specifically carbon monoxide management and grease fire prevention — should drive ventilation decisions, not just comfort preferences
As climate patterns continue to push summer temperatures into previously unusual ranges, the outdoor kitchen owners who invest in genuine, layered ventilation strategies in 2026 won’t just be more comfortable — they’ll be ahead of a trend that’s reshaping how the outdoor living industry thinks about design standards entirely.
So here’s the question worth sitting with: Is your outdoor kitchen designed for the summers you used to have, or for the summers you’re actually going to be cooking in?
Article reviewed by Linda Phillips, Senior Architectural Consultant & Renovation Project Manager, on June 8, 2026