How to Build a Fire Pit Seating Area on a Budget
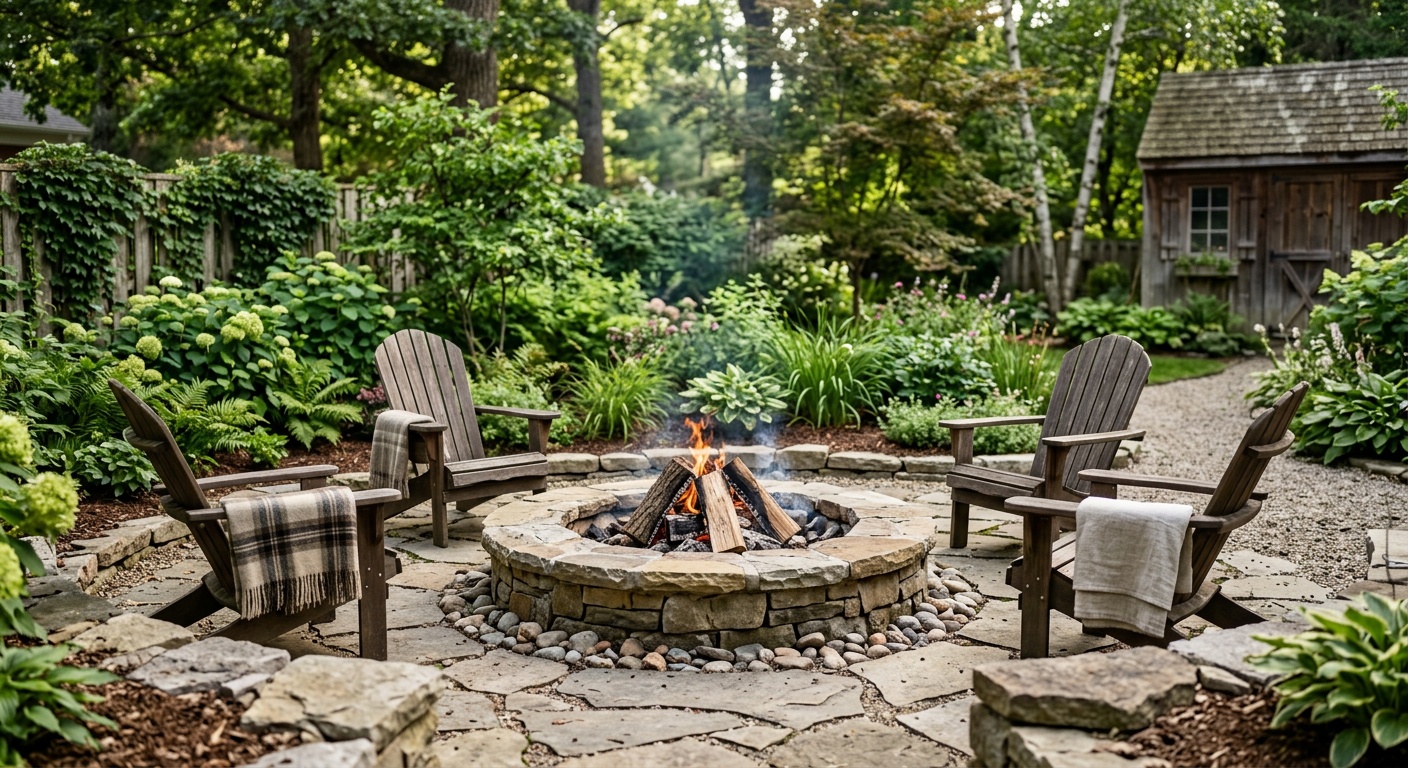
How to Build a Fire Pit Seating Area on a Budget: A Complete 2026 Guide
Reading time: 14 minutes
Ever stared at your backyard and imagined a cozy gathering spot where friends and family pull up a chair, roast marshmallows, and let the night stretch on? You’re not alone. In 2026, outdoor living spaces have become one of the fastest-growing home improvement categories in North America — and the fire pit seating area sits right at the heart of that movement.
But here’s the straight talk: you don’t need a $10,000 landscaping budget or a professional contractor to make it happen. With the right strategy, some elbow grease, and a budget as low as $300–$800, you can build a stunning, functional fire pit seating area that rivals anything you’d find in a high-end outdoor showroom.
This guide is your practical roadmap — from choosing the right materials and layout to staying safe and keeping costs in check. Let’s turn that empty patch of yard into your favorite room in the house.
Table of Contents
- Why 2026 Is the Perfect Time to Build
- Planning Your Fire Pit Seating Area
- Choosing the Right Materials on a Budget
- Step-by-Step Build Guide
- Budget Seating Ideas That Actually Look Great
- Cost Comparison: DIY vs. Professional Installation
- Common Challenges and How to Overcome Them
- Safety Essentials You Can’t Skip
- Frequently Asked Questions
- Light It Up: Your Action Plan for Getting Started
Why 2026 Is the Perfect Time to Build
The outdoor living industry has exploded in the post-2020 era, and the momentum hasn’t slowed. According to the American Society of Landscape Architects’ 2025 Outdoor Living Trends Report, fire features remained the #1 most requested residential outdoor element for the fourth consecutive year. Meanwhile, a 2025 survey by the National Association of Home Builders found that 73% of new homebuyers ranked outdoor entertaining spaces as a priority — up from 58% in 2020.
What’s changed in 2026 specifically? Two things work in your favor right now:
- Material costs have stabilized. After supply chain disruptions in 2022–2024, concrete block, gravel, and lumber prices have settled, making DIY projects more predictable than they’ve been in years.
- Online resource availability is at an all-time high. Free design tools, community forums, and tutorial videos mean you can plan and execute a professional-grade project without hiring a designer.
Beyond trends, there’s a deeply personal reason to build now: a fire pit seating area is one of the few home improvements that pays dividends in daily quality of life, not just resale value. Real estate analysts in 2025 noted that well-designed outdoor living spaces can add 5–15% to a home’s perceived value — but the real return is measured in evenings well spent.
Planning Your Fire Pit Seating Area
Starting With the Right Questions
Before you pick up a shovel, spend 30 minutes answering these foundational questions. Skipping this step is the single biggest mistake DIY builders make — and it’s the reason so many fire pits end up too close to fences, too far from the house, or surrounded by seating that’s uncomfortable to use.
- How many people will you typically host? A cozy setup for 4–6 people requires a different scale than a social hub for 10–14.
- What’s your primary fuel type? Wood-burning pits offer ambiance; propane or natural gas pits offer convenience and cleaner burn.
- What’s the shape of your available space? Round fire pits work beautifully in open areas; rectangular or linear designs suit narrow or structured spaces better.
- What’s your total budget? Set a firm number before you shop. We’ll help you work within it.
Measuring and Mapping Your Space
The golden rule of fire pit design: maintain a minimum 10-foot clearance between the fire pit and any structure, fence, tree, or overhead covering. Most local fire codes in the U.S. and Canada require this, and for good reason. Check your municipality’s regulations — in 2026, many cities have updated their open-flame ordinances, so what applied a few years ago may have changed.
For a comfortable seating area, plan on a total footprint of 12–16 feet in diameter. This gives you room for the pit itself (typically 3–4 feet across), a safe heat buffer zone, and enough depth in each seat for comfortable legroom. Sketch your space on graph paper or use a free tool like RoomSketcher or Planner 5D — both have outdoor planning features and are free for basic use in 2026.
Choosing the Right Materials on a Budget
Fire Pit Construction Options
Here’s where budget decisions get interesting. You have several solid options at very different price points:
- Retaining wall blocks (aka pavers): The classic budget-friendly choice. A standard 36-inch diameter ring uses about 25–35 blocks. At roughly $1.50–$3.00 per block in 2026, you’re looking at $40–$100 for the pit structure alone. Brands like Pavestone and Oldcastle are widely available at Home Depot and Lowe’s.
- Cinder blocks or concrete blocks: Even cheaper — sometimes $0.75–$1.50 each — and extremely durable. Less decorative, but you can finish them with heat-resistant paint for a polished look.
- Prefabricated steel fire rings: A steel insert ($30–$80) placed inside a stone surround protects your blocks from the most intense heat and extends the life of your pit dramatically. This is a highly recommended upgrade even on tight budgets.
- Repurposed materials: Old washing machine drums, large terracotta planters with drainage holes, or salvaged bricks from demolition sites (check Craigslist and Facebook Marketplace) can bring costs to near zero for the pit structure itself.
Ground Surface Materials
The area surrounding your fire pit needs a non-combustible, level base. Your budget-friendly options:
- Pea gravel: $3–$6 per cubic foot. Easy to install, excellent drainage, comfortable underfoot, and naturally fire-resistant. One of the best budget choices for the overall seating pad.
- Decomposed granite: Similar price to pea gravel, packs down firmer, and creates a more solid surface. Popular in drier climates.
- Concrete pavers: More expensive ($1.50–$4.00 each) but create a more permanent, polished look. You can often find discounted or discontinued pavers at landscape supply stores.
- Sand-set flagstone: Irregular flagstone creates a natural, rustic aesthetic and can be sourced cheaply from local quarries or salvage yards.
Step-by-Step Build Guide
Phase 1: Site Preparation (Day 1)
Mark your circle using a stake, a string, and spray paint. Drive the stake into the center of where you want the pit, attach a string at your desired radius (usually 6–8 feet from center for the full seating area), and walk the circumference while spraying paint. You now have your working boundary.
Remove all grass and vegetation inside the marked area. Dig down 2–3 inches across the entire seating pad. This shallow excavation creates your base for gravel and prevents the seating area from sitting higher than the surrounding yard — a subtle detail that makes a big difference in how professional the finished result looks.
Phase 2: Building the Fire Pit Structure (Day 1–2)
Dig a centered circle approximately 4 feet in diameter and 6 inches deep for the pit itself. Fill the pit base with 3–4 inches of gravel — this critical drainage layer prevents moisture buildup that can crack your blocks over time through freeze-thaw cycles.
Begin stacking your blocks in a circular pattern, dry-stacking (no mortar) for the first two rows if you want a removable or adjustable structure. Stagger your joints like brickwork for maximum stability. Do not use mortar unless you’re sure about your design — mortar cracks under repeated heating and cooling cycles and is difficult to repair.
Stack your blocks 2–3 courses (rows) high for a finished height of roughly 12–16 inches. This is the sweet spot: high enough to contain embers, low enough to see over comfortably from your seating.
Phase 3: Setting the Ground Surface (Day 2)
Lay a geotextile landscape fabric over your excavated area (around $0.10–$0.20 per square foot) before adding your surface material. This prevents weeds from growing up through your gravel and extends the life of your installation significantly.
Add 2–3 inches of your chosen surface material. Rake it level. Take your time here — a properly leveled surface makes everything else look better and ensures stable, wobble-free seating.
Phase 4: Finishing and Personalizing (Day 3)
This is where your fire pit area gets its personality. Add edging around the perimeter to keep your gravel contained (metal landscape edging is $0.50–$1.00 per linear foot). Place your seating. Add lighting. The details matter enormously here — a few string lights and a couple of well-placed lanterns can transform a basic gravel pad into a genuinely beautiful outdoor room.
Budget Seating Ideas That Actually Look Great
Seating is where many DIYers blow their budget unnecessarily. Here’s the reality: great-looking fire pit seating doesn’t require expensive patio furniture. Let’s look at three proven approaches at different budget levels.
Example 1 — The Cinder Block Bench Build (Budget: ~$80–$120 total): Stack two courses of cinder blocks in an L-shape or arc around your fire pit. Top with a 2×10 or 2×12 cedar plank ($20–$35 for an 8-foot board). Sand the wood, apply an exterior stain or sealant, and add outdoor cushions from a discount retailer. This is genuinely attractive, infinitely durable, and can be built in an afternoon. A homeowner in Boise, Idaho documented this exact build on a DIY forum in early 2026 for a total seating cost of $94 — and the results looked like a professional landscape designer’s work.
Example 2 — The Thrift Store/Facebook Marketplace Mix (Budget: ~$50–$150 total): Mismatched chairs around a fire pit have a charming, collected aesthetic that’s very much in style in 2026. Search Facebook Marketplace and local thrift stores for wooden or metal chairs. Buy a can of spray paint in a coordinating color ($5–$8 each) and paint them for a cohesive look. A family in Austin, Texas documented transforming five mismatched chairs for a total of $67 into a Pinterest-worthy fire pit setup that their neighbors immediately asked to copy.
Example 3 — Log Rounds and Stumps (~$0–$60): If you’re going for a rustic aesthetic, large log rounds make incredible natural seating. Freshly cut rounds can be sourced from tree removal services (often free — they’re glad to offload them). Let them dry for a few months, apply an exterior wood sealant, and you have seating with genuine character that costs almost nothing.
Cost Comparison: DIY vs. Professional Installation
| Category | DIY Budget Build | DIY Mid-Range | Professional Install |
|---|---|---|---|
| Fire Pit Structure | $40–$100 | $150–$300 | $800–$2,500 |
| Ground Surface (12-ft pad) | $60–$120 | $200–$500 | $1,000–$3,000 |
| Seating | $50–$150 | $300–$800 | $1,500–$5,000 |
| Lighting & Accessories | $20–$60 | $100–$300 | $500–$2,000 |
| Total Estimated Cost | $170–$430 | $750–$1,900 | $3,800–$12,500 |
Budget Allocation Visualization
Where does the money go in a typical DIY budget build? Here’s how a $350 budget might break down:
Common Challenges and How to Overcome Them
Challenge 1: Uneven or Sloped Terrain
Many backyards aren’t perfectly flat, and a sloped fire pit area is both unattractive and potentially dangerous. The solution doesn’t have to be expensive. For gentle slopes (less than 6 inches of grade change across your seating area), simply dig deeper on the high side and use extra gravel to level up the low side. For steeper slopes, a simple two-tier design using retaining wall blocks on the downhill side creates a level pad with built-in visual interest.
Pro Tip: Rent or borrow a 4-foot level and a hand tamper from your local tool library or equipment rental shop (typically $10–$15/day) rather than buying tools you’ll use once. Many public libraries in 2026 now operate “tool lending libraries” — a genuinely underused resource.
Challenge 2: Staying Warm Enough to Actually Use It Year-Round
Building a fire pit seating area is one thing; building one you’ll actually use in October, November, and March in northern climates is another. The fix is thoughtful design, not more money. Orient your seating area to maximize windbreak from your home’s structure or existing fencing. For less than $60, you can install a simple trellis or bamboo privacy screen on the windward side that dramatically improves comfort in cool weather. Adding outdoor-rated blanket storage (a waterproof wicker basket, $25–$45) gives guests easy access to wraps on chilly evenings.
Challenge 3: Budget Creep During the Build
This is the silent killer of DIY projects. You start with a $400 budget and end up spending $900 because “while you were at Home Depot you saw this great…” Sound familiar? The antidote is a locked shopping list and a single pre-build materials run. Estimate your quantities before you shop, add a 10% contingency buffer, and commit to that list. A useful strategy: price out your entire materials list online first, then go to the store. You’ll be less susceptible to in-store impulse additions when you already know exactly what you need and what it costs.
Safety Essentials You Can’t Skip
This section isn’t here to scare you — it’s here to make sure your beautiful new fire pit area remains a place of joy rather than a source of regret. Every year, preventable fire pit accidents cause property damage and injuries that simple precautions would have avoided.
- Never use a fire pit under a covered structure or near low-hanging branches. The 10-foot clearance rule is a minimum, not a suggestion.
- Keep a bucket of sand or water within arm’s reach. A garden hose also works, but sand smothers fires faster than water and is safer for controlling flare-ups.
- Never burn treated wood, plywood, painted wood, or manufactured wood products. These release toxic chemicals when burned. Only use seasoned hardwood or designated fire pit logs.
- Use a spark screen. A simple steel spark screen ($15–$35) prevents embers from escaping the pit during windy conditions. This is one of the highest-value safety investments you can make.
- Check local regulations before your first burn. Many municipalities have seasonal burn bans, and violating them can result in fines. Sign up for your local fire department’s text alert system — most U.S. and Canadian cities now offer this service free of charge in 2026.
- Never leave a fire unattended. Fully extinguish the fire before going indoors. Embers can remain active for hours after flames die down.
Frequently Asked Questions
Do I need a permit to build a backyard fire pit?
In most U.S. and Canadian municipalities, a simple wood-burning fire pit that isn’t permanently affixed to the ground does not require a building permit. However, permanent structures — including gas fire pits connected to a natural gas line — often require permits and inspections. Regulations vary significantly by city, county, and state/province, and many localities updated their ordinances in 2025. Always check with your local planning or fire department before building, especially if you live in a wildfire-prone area or in a neighborhood governed by a homeowners association (HOA). This call takes five minutes and can save you significant headaches later.
What type of fire pit is best for a budget build?
For pure budget efficiency, a dry-stacked retaining wall block fire pit with a steel insert ring is the gold standard. It costs $50–$130 to build, is highly durable, looks attractive, and requires no specialized skills or tools. Propane fire pits offer more convenience and produce less smoke — ideal for urban settings or locations with frequent burn restrictions — but the initial cost is higher ($150–$400 for a decent portable unit) and ongoing fuel costs add up. Wood-burning wins on atmosphere and cost per use; propane wins on convenience and compliance. Consider your specific situation honestly before choosing.
How do I make cheap fire pit seating look expensive?
Three things transform budget seating into something that looks intentional and polished: consistency of color, quality of cushions, and good lighting. Painting mismatched chairs in a single coordinating color (matte black, warm cream, or terracotta are perennially popular in 2026) creates instant visual cohesion. Investing in weather-resistant cushions with a solid or subtle pattern — even budget cushions from IKEA or Amazon — adds softness and perceived quality. Finally, solar-powered string lights draped overhead create a magical atmosphere that makes everything beneath them look better. None of this is expensive; all of it is transformative.
Light It Up: Your Action Plan for Getting Started
You now have everything you need to move from idea to reality. The fire pit seating area you’ve been imagining isn’t a distant dream — it’s a weekend project with a shopping list and a shovel. Here’s your step-by-step launch plan:
- This week: Sketch your space, check local regulations, and set your firm budget. Write it down. Share it with your household.
- Before your materials run: Price out your full shopping list online. Check Facebook Marketplace and Craigslist for free or discounted blocks, stones, or seating materials.
- Weekend 1: Site prep and fire pit construction. This is your foundation — take your time on leveling and placement.
- Weekend 2: Surface installation and seating setup. This is also when the fun begins — you can see it coming together.
- First evening: Light a small test fire, gather your people, and enjoy the space you built yourself.
The broader context here is meaningful: in 2026, there’s a growing cultural shift back toward home-centered community — people investing in their own spaces as gathering places. A fire pit seating area isn’t just a backyard feature; it’s an investment in the relationships and moments that make a house feel like a home.
So here’s the question worth sitting with as you plan your build: What conversations, stories, and memories do you want to happen around your fire? Build toward those moments — and let everything else follow from there.
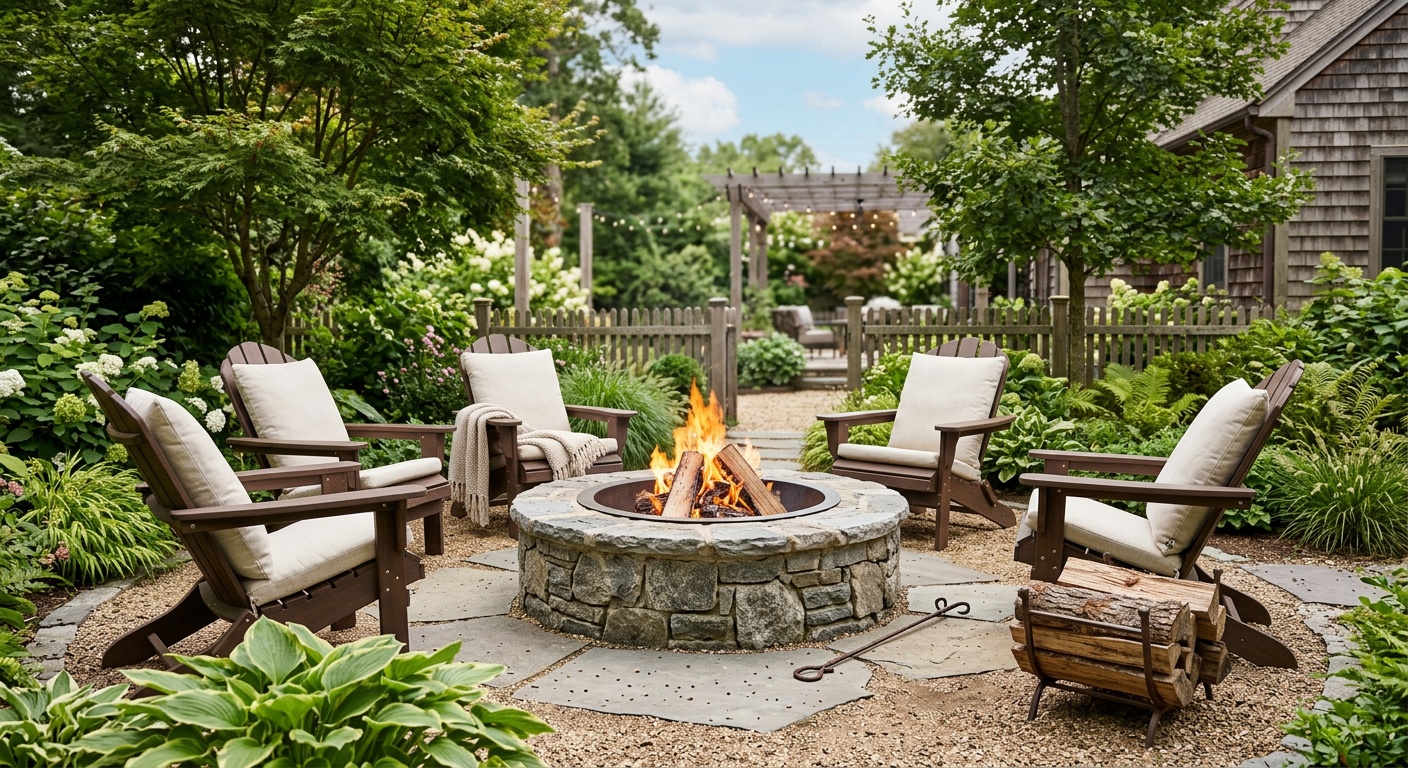
Article reviewed by Linda Phillips, Senior Architectural Consultant & Renovation Project Manager, on June 8, 2026